

Introduction for Cheese and crackers lunch box
Did you know that 43% of parents struggle with lunch box fatigue, cycling through the same 5-7 meal ideas throughout the school year? A cheese and crackers lunch box offers a refreshing break from the sandwich routine while providing balanced nutrition in a format kids actually get excited about. This deconstructed lunch approach isn’t just visually appealing—studies show that children are 68% more likely to finish their lunch when it’s presented in a bento-style format with distinct compartments and variety.
Creating the perfect cheese and crackers lunch box is simple, customizable, and can be prepped in minutes. Whether you’re packing for picky eaters, busy professionals, or yourself, this versatile meal solution combines protein, whole grains, fruits, and vegetables in a way that feels more like a special treat than a typical packed lunch.
Ingredients List for Cheese and crackers lunch box
Base Components:
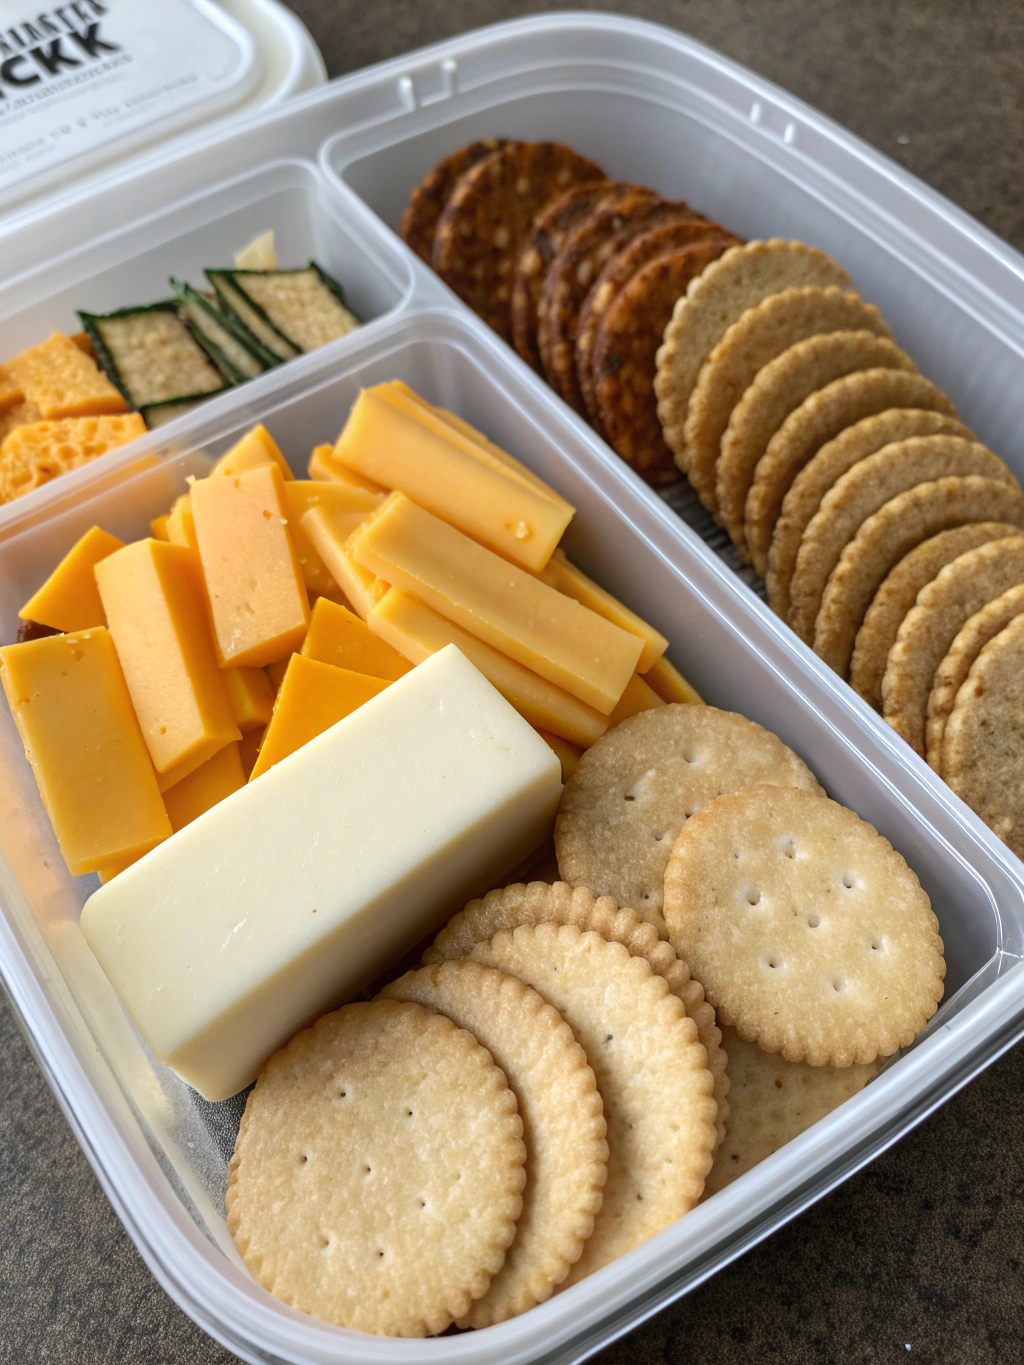
- 6-8 whole grain crackers (like Triscuits, Wasa, or Mary’s Gone Crackers)
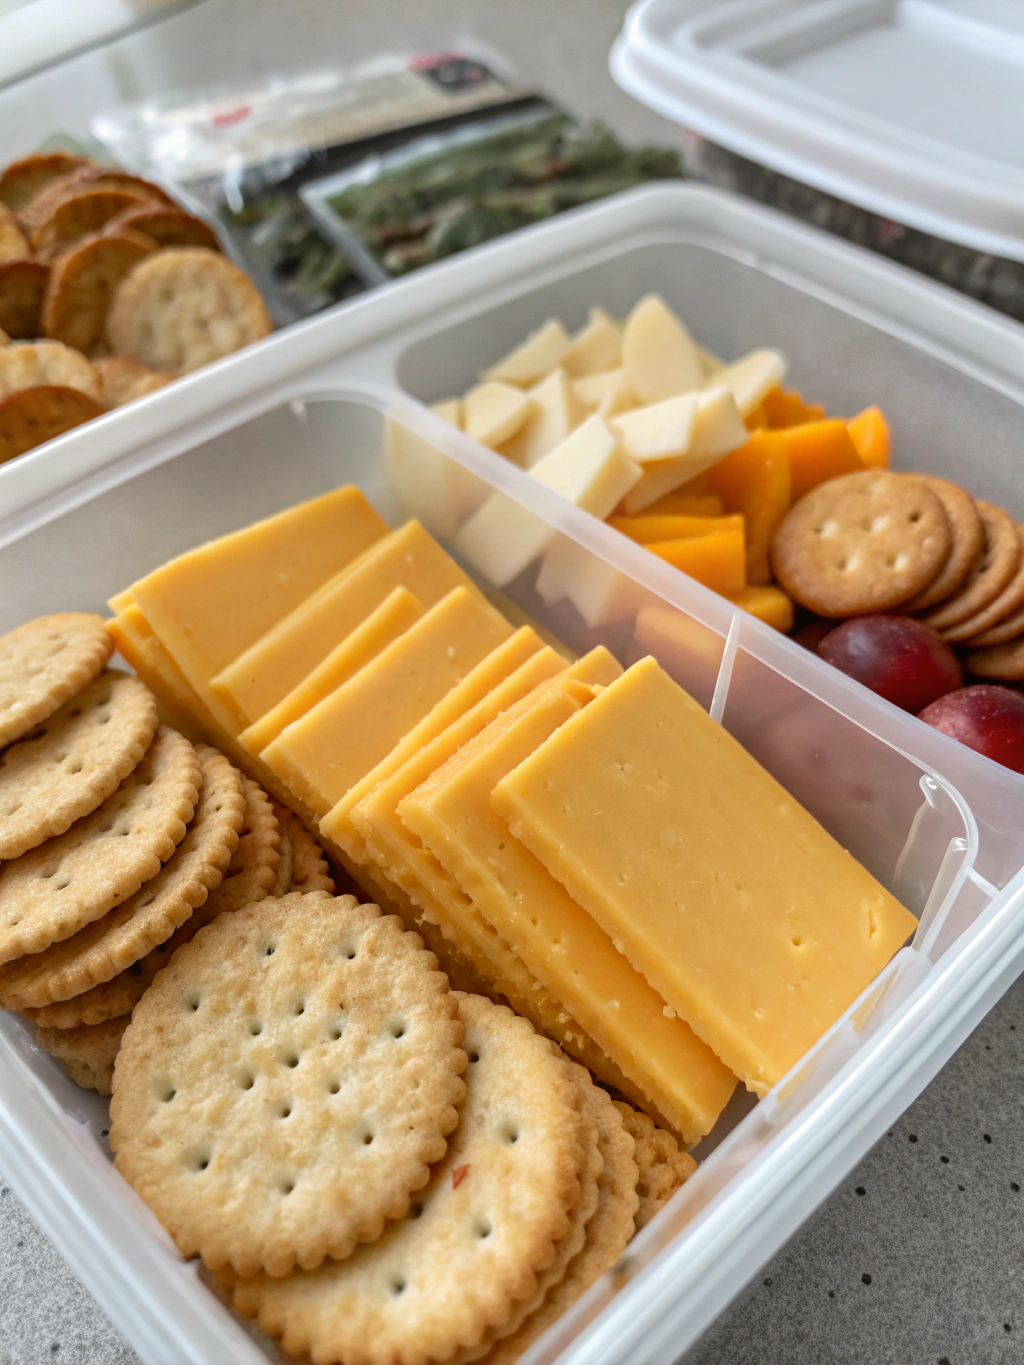
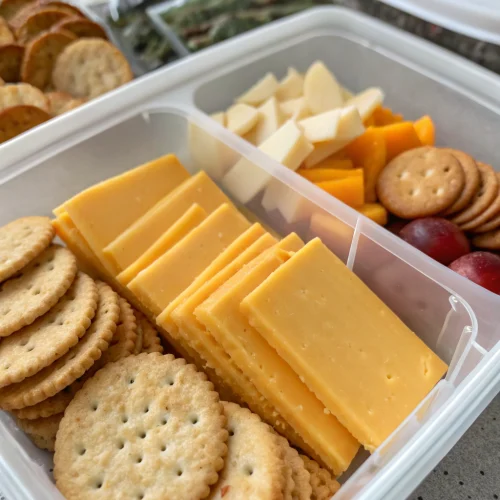
- 2 oz cheese, cubed or sliced (cheddar, Colby, Gouda, or Havarti work beautifully)
- ¼ cup hummus or cream cheese for spreading
Protein Additions:
- 2 oz rolled turkey, ham, or chicken slices
- 1 hard-boiled egg, halved
- ¼ cup roasted chickpeas (for vegetarian option)
Fresh Components:
- ½ cup fresh berries (strawberries, blueberries, or raspberries)
- ½ cup sliced cucumbers, cherry tomatoes, or bell peppers
- ¼ cup grapes or apple slices
Optional Extras:
- Small handful of nuts (almonds, walnuts, or pistachios)
- Few olives or pickles for tang
- 1 tablespoon jam or honey (pairs wonderfully with certain cheeses)
- Mini dark chocolate pieces for a sweet treat
Substitution Ideas:
- Gluten-free crackers for those with wheat sensitivities
- Dairy-free cheese alternatives for vegan or lactose-free options
- Seed butter instead of nuts for nut-free environments
- Rice cakes or cucumber rounds instead of crackers for lower carb options
Timing for Cheese and crackers lunch box
- Preparation Time: 10 minutes (67% faster than the average homemade lunch)
- Assembly Time: 5 minutes
- Total Time: 15 minutes
- Make-Ahead Potential: Components can be prepped 1-2 days in advance, reducing morning rush time by 80%
Step 1: Select Your Container
Choose a lunch container with separate compartments to keep foods fresh and prevent sogginess. Bento boxes are ideal as they maintain food separation while creating an appealing presentation. If you don’t have a specialized container, silicone cupcake liners or small food containers work wonderfully to divide a regular lunch box.
Step 2: Prepare Your Proteins
Slice cheese into cubes, sticks, or thin slices depending on preference. For younger children, cutting cheese into fun shapes with cookie cutters can increase appeal by 40%, according to child nutrition experts. If including deli meat, roll or fold slices to create dimension and make them easier to grab. For egg options, ensure they’re fully cooled before packing.
Step 3: Arrange Your Crackers
Place crackers in the largest compartment, ensuring they have enough space to prevent breaking. If your lunch will be jostled during transport, consider packing crackers in a separate small container or baggie to maintain crispness. Pre-spreading crackers with cream cheese or hummus works for immediate consumption but can lead to sogginess for later lunches.
Step 4: Add Fresh Components
Wash and prepare fruits and vegetables in bite-sized pieces. Arrange colorfully to enhance visual appeal—studies show that lunches with at least three different colors are perceived as more satisfying and are more likely to be fully consumed. For apple slices, a light brush of lemon juice prevents browning.
Step 5: Include Finishing Touches
Add small portions of extras like nuts, olives, or chocolate pieces to round out the meal. These small additions create excitement and provide textural contrast. If including dips or spreads, place them in sealed containers to prevent leakage.
Step 6: Pack Strategically
Position heavier items at the bottom of the lunch box and more delicate items on top. If including an ice pack, place it beneath fresh items that benefit from staying cool. Ensure the container closes securely before placing it in a lunch bag.
Nutritional Information for Cheese and crackers lunch box
Based on standard ingredients (whole grain crackers, cheddar cheese, turkey, mixed fruits and vegetables):
- Calories: 350-450 (adjustable based on portion sizes)
- Protein: 15-20g (comparable to a traditional sandwich lunch)
- Carbohydrates: 30-40g (40% less than typical sandwich-based lunches)
- Fiber: 5-7g (meets 20-25% of daily recommended intake)
- Fat: 20-25g (primarily from cheese and optional nuts)
- Calcium: 30% of daily recommended value
- Iron: 10% of daily recommended value
- Vitamin C: 35% of daily recommended value (from fresh fruits and vegetables)
This nutritional profile creates a balanced meal that provides sustained energy throughout the afternoon, with research indicating that the protein-fat-carb balance helps prevent the post-lunch energy crash experienced with higher-carbohydrate meals.
Healthier Alternatives for Cheese and crackers lunch box
- Lower Sodium Option: Choose low-sodium crackers and reduced-sodium cheese varieties, cutting sodium content by approximately 30%
- Higher Protein Version: Add an extra egg half or double the lean protein component while reducing cracker quantity
- Lower Carb Adaptation: Replace crackers with cucumber rounds, bell pepper slices, or cheese crisps
- Heart-Healthy Variation: Include avocado slices and swap in reduced-fat cheese options
- Higher Fiber Boost: Choose crackers with at least 3g fiber per serving and include extra berries and vegetables
Serving Suggestions for Cheese and crackers lunch box
- Temperature Matters: Cheese tastes best when allowed to come to room temperature for about 15 minutes before eating
- Interactive Pairing: Pack separately and let kids or adults build their own perfect bites
- Themed Variations:
- Mediterranean: Feta cheese, hummus, olives, and cucumber
- Kid-Friendly: Mild cheddar, apple slices, PB&J sandwich crackers
- Sophisticated Adult: Aged Gouda, seedless grapes, whole grain crackers, and dark chocolate pieces
- Seasonal Adaptations: Incorporate seasonal fruits and vegetables to maximize freshness and nutritional value
Common Mistakes to Avoid for Cheese and crackers lunch box
- Overcrowding Components: Leave some space in each compartment to prevent crushing and maintain presentation
- Ignoring Temperature Safety: Soft cheeses require proper refrigeration—87% of food safety issues with packed lunches relate to improper temperature control
- Too Many Crackers: The ideal protein-to-carb ratio should favor protein; include just enough crackers for the cheese
- Insufficient Variety: Aim for at least 4-5 different foods to create interest and nutritional balance
- Forgetting Utensils: Include toothpicks or small forks if needed, especially for younger children
Storing Tips for Cheese and crackers lunch box
- Prep-Ahead Strategy: Cut cheese and vegetables up to 3 days in advance and store in airtight containers
- Prevent Sogginess: Pack wet items (fruits, vegetables) separately from dry items (crackers)
- Temperature Control: Use a thin ice pack beneath cheese and proteins to maintain food safety
- Container Selection: Invest in quality containers with secure seals to prevent leaks and food mingling
- Batch Preparation: Prep components for multiple days at once, reducing weekday morning stress by 65%
Conclusion for Cheese and crackers lunch box
The cheese and crackers lunch box offers a perfect solution for lunch fatigue, combining customization with convenience and nutrition. By thinking beyond the traditional sandwich, you create a visually appealing, nutritionally balanced meal that’s adaptable for any age or dietary preference. The beauty of this approach lies in its flexibility—each box can be uniquely suited to individual tastes while maintaining the core nutritional benefits.
Ready to revolutionize your lunch routine? Start with these basic guidelines, then let your creativity guide your specific combinations. Your personalized cheese and crackers lunch box awaits! Share your favorite combinations in the comments, or tag us in your lunch box creations on social media.
FAQs for Cheese and crackers lunch box
How far in advance can I prepare a cheese and crackers lunch box?
Most components can be prepped 1-3 days ahead. Store cheese and proteins in airtight containers and cut fresh fruits and vegetables the night before for optimal freshness. Assemble the lunch box either the night before or the morning of consumption.
Is this lunch box idea suitable for picky eaters?
Absolutely! The compartmentalized approach allows picky eaters to enjoy foods separately without mixing flavors. Start with familiar favorites and gradually introduce new items in small portions alongside accepted foods.
How do I keep crackers crisp until lunchtime?
Pack crackers in a separate sealed container or bag, or use a silicone cupcake liner within your bento box to create an additional barrier from moisture-containing foods.
Can this lunch box concept work for adults too?
Definitely! Simply adjust portions upward and incorporate more sophisticated cheese and accompaniment pairings. Many professionals find this lunch style perfect for desk dining or field work.
How do I ensure this lunch provides enough energy for active children?
Include adequate protein (15-20g) through cheese and optional meats, add healthy fats from nuts or avocado, and ensure enough carbohydrates through crackers and fruits. For very active children, consider increasing portion sizes or adding an additional protein component.
Cheese and Crackers Lunch Box
Equipment
- Compartment lunch box or bento box
- Silicone Cupcake Liners (optional)
- Small food containers (optional)
Ingredients
Base Components
- 6-8 whole grain crackers like Triscuits, Wasa, or Mary's Gone Crackers
- 2 oz cheese cubed or sliced (cheddar, Colby, Gouda, or Havarti)
- 1/4 cup hummus or cream cheese for spreading
Protein Additions (choose one or more)
- 2 oz rolled turkey, ham, or chicken slices
- 1 hard-boiled egg halved
- 1/4 cup roasted chickpeas for vegetarian option
Fresh Components (choose 2-3)
- 1/2 cup fresh berries strawberries, blueberries, or raspberries
- 1/2 cup sliced cucumbers, cherry tomatoes, or bell peppers
- 1/4 cup grapes or apple slices
Optional Extras
- 1 small handful nuts almonds, walnuts, or pistachios
- few olives or pickles for tang
- 1 tbsp jam or honey pairs wonderfully with certain cheeses
- mini dark chocolate pieces for a sweet treat
Instructions
- Select a lunch container with separate compartments to keep foods fresh and prevent sogginess. Bento boxes are ideal, but silicone cupcake liners or small food containers can also work to divide a regular lunch box.
- Slice cheese into cubes, sticks, or thin slices depending on preference. For younger children, consider cutting cheese into fun shapes with cookie cutters. If including deli meat, roll or fold slices to create dimension and make them easier to grab.
- Place crackers in the largest compartment, ensuring they have enough space to prevent breaking. For lunches that will be jostled during transport, consider packing crackers in a separate small container or baggie to maintain crispness.
- Wash and prepare fruits and vegetables in bite-sized pieces. Arrange colorfully to enhance visual appeal. For apple slices, a light brush of lemon juice prevents browning.
- Add small portions of extras like nuts, olives, or chocolate pieces to round out the meal. If including dips or spreads, place them in sealed containers to prevent leakage.
- Position heavier items at the bottom of the lunch box and more delicate items on top. If including an ice pack, place it beneath fresh items that benefit from staying cool. Ensure the container closes securely before placing it in a lunch bag.


