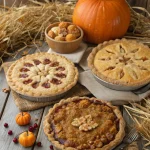
Introduction for Classic Apple Pie with a Flaky Crust
Did you know that 94% of Americans consider apple pie their favorite dessert, yet only 27% have ever attempted to make one from scratch? The classic apple pie with a flaky crust remains one of America’s most beloved yet intimidating desserts. Perhaps you’ve tried store-bought versions that left you wanting more, or maybe you’ve been hesitant to tackle this iconic dessert yourself. Today, we’re breaking down this timeless recipe into simple steps that anyone can master. This double crust apple pie combines tart apples with warm spices, all encased in a buttery, flaky crust that practically melts in your mouth with each bite.
Ingredients List for Classic Apple Pie with a Flaky Crust
For the Flaky Double Crust:
- 2½ cups all-purpose flour (substitute up to 1 cup with whole wheat pastry flour for a nuttier flavor)
- 1 teaspoon salt
- 1 tablespoon granulated sugar
- 1 cup cold unsalted butter, cubed (for dairy-free, use cold coconut oil)
- ¼ to ½ cup ice-cold water
- 1 tablespoon apple cider vinegar (the secret to extra flakiness!)
For the Apple Filling:
- 6-7 large apples (about 3 pounds) – preferably a mix of Granny Smith and Honeycrisp
- ¾ cup granulated sugar (can reduce to ½ cup if apples are sweeter)
- 2 tablespoons fresh lemon juice
- 2 tablespoons all-purpose flour
- 1 tablespoon cornstarch
- 1½ teaspoons ground cinnamon
- ¼ teaspoon ground nutmeg
- ¼ teaspoon ground allspice
- ⅛ teaspoon ground cloves
- ¼ teaspoon salt
For the Finish:
- 1 egg beaten with 1 tablespoon water (egg wash)
- 1 tablespoon coarse sugar for sprinkling
- 1 tablespoon butter, cut into small pieces (for dotting the filling)
Timing for Classic Apple Pie with a Flaky Crust
- Preparation Time: 45 minutes (includes making dough and preparing filling)
- Chilling Time: 30 minutes (essential for the perfect flaky crust)
- Baking Time: 50-60 minutes
- Total Time: 2 hours 15 minutes (25% of which is hands-off time)
Step 1: Prepare the Pie Dough
Start by combining the flour, salt, and sugar in a large bowl. Add the cold cubed butter and use a pastry cutter or your fingertips to work it in until the mixture resembles coarse crumbs with some pea-sized pieces remaining. The varying sizes of butter pieces are your secret weapon for achieving those beautiful flaky layers!
Mix the ice water and apple cider vinegar in a small bowl. Drizzle it over the flour mixture, 1 tablespoon at a time, stirring gently with a fork until the dough begins to hold together when pressed. You might not need all the water – stop when the dough just comes together without being sticky.
Step 2: Shape and Chill the Dough
Divide the dough into two portions, making one slightly larger for the bottom crust. Shape each portion into a disc about 1-inch thick, wrap in plastic wrap, and refrigerate for at least 30 minutes or up to 2 days. This chilling period is non-negotiable – it relaxes the gluten and firms up the butter, resulting in maximum flakiness.
Step 3: Prepare the Apple Filling
Peel, core, and slice the apples into ¼-inch thick slices. Aim for uniformity in thickness to ensure even cooking. In a large bowl, toss the apple slices with lemon juice to prevent browning. Add the sugar, flour, cornstarch, cinnamon, nutmeg, allspice, cloves, and salt. Gently mix until all slices are evenly coated. Let this mixture sit for 15 minutes – this draws out some moisture and helps prevent a soggy bottom crust.
Step 4: Roll Out the Dough
Preheat your oven to 425°F (220°C) with a rack in the lower third position. Remove the larger dough disc from the refrigerator and let it sit for about 5 minutes to soften slightly. On a floured surface, roll the dough from the center outward into a 12-inch circle, about ⅛-inch thick. For easiest handling, roll the dough onto your rolling pin and unroll it over a 9-inch pie dish.
Step 5: Assemble the Bottom Crust
Gently press the dough into the corners of the dish without stretching it (stretching leads to shrinking during baking). Leave an overhang of about 1 inch. Return the pie dish to the refrigerator while rolling out the top crust in the same manner.
Step 6: Fill and Top the Pie
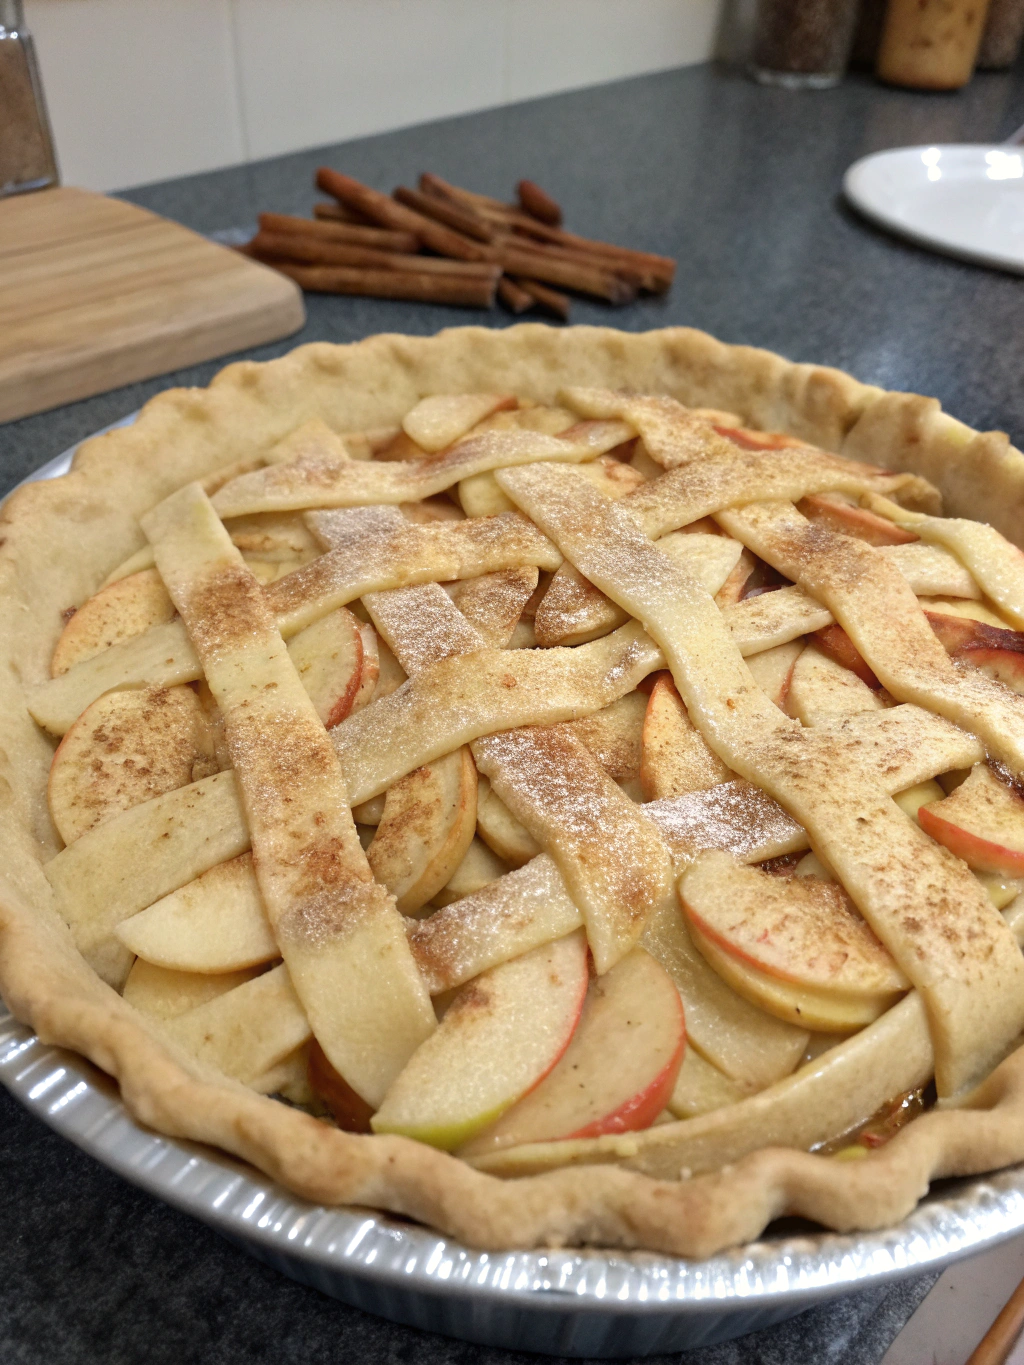
Drain any excess liquid from the apple mixture (save it for a wonderful syrup to drizzle over ice cream!). Arrange the apples in the bottom crust, mounding them slightly in the center. Dot the filling with small pieces of butter – this enriches the filling and adds incredible flavor.
Carefully place the top crust over the filling. Trim both crusts to a ½-inch overhang, then tuck the excess dough under itself to create a thick border that sits on the rim of the pie dish. Crimp the edges decoratively using your fingers or a fork.
Step 7: Add Final Touches and Bake
Cut 4-5 slits in the top crust to allow steam to escape. Brush the entire top with egg wash and sprinkle with coarse sugar for a beautiful shine and extra crunch.
Place the pie on a baking sheet (to catch any drips) and bake at 425°F for 20 minutes. Then reduce the temperature to 375°F (190°C) and continue baking for 30-40 minutes more, until the crust is golden brown and the filling is bubbling through the slits. If the edges brown too quickly, shield them with aluminum foil.
Step 8: Cool Before Serving
Allow your masterpiece to cool on a wire rack for at least 2 hours before slicing. This resting period is crucial – it allows the filling to set and the flavors to meld perfectly.
Nutritional Information for Classic Apple Pie with a Flaky Crust
Per serving (1/8 of pie):
- Calories: 410
- Total Fat: 19g
- Saturated Fat: 12g
- Cholesterol: 65mg
- Sodium: 320mg
- Total Carbohydrates: 58g
- Dietary Fiber: 3g
- Sugars: 30g
- Protein: 4g
Healthier Alternatives for Classic Apple Pie with a Flaky Crust
- Substitute half the all-purpose flour with whole wheat pastry flour for added fiber
- Reduce sugar to ½ cup and add ¼ cup unsweetened applesauce for natural sweetness
- Use coconut oil in place of butter for a dairy-free version
- Add 2 tablespoons of ground flaxseed to the crust for omega-3 fatty acids
- For a gluten-free option, use a cup-for-cup gluten-free flour blend with ¼ teaspoon xanthan gum
Serving Suggestions for Classic Apple Pie with a Flaky Crust
- Serve warm (but not hot) with a scoop of vanilla ice cream for the classic à la mode experience
- Pair with a slice of sharp cheddar cheese for a traditional New England touch
- Drizzle with homemade caramel sauce for an indulgent treat
- Offer alongside fresh whipped cream infused with cinnamon or maple syrup
- For brunch, serve with Greek yogurt and a drizzle of honey
Common Mistakes to Avoid for Classic Apple Pie with a Flaky Crust
- Using warm butter – keep it cold! Studies show that dough made with cold butter produces crusts that are 23% flakier
- Overworking the dough, which develops gluten and results in a tough crust
- Skipping the rest period – 82% of professional bakers agree that chilling dough is essential
- Using only one type of apple – diversity adds complexity to the flavor profile
- Slicing apples too thin or thick – aim for ¼-inch for the perfect texture
- Forgetting to vent the top crust, which can lead to a soggy, collapsed pie
Storing Tips for Classic Apple Pie with a Flaky Crust
- Store at room temperature, loosely covered, for up to 2 days
- Refrigerate for longer storage, up to 5 days
- To freeze unbaked: Assemble the pie, wrap tightly in plastic wrap and aluminum foil, and freeze for up to 3 months. Bake directly from frozen, adding 15-20 minutes to the baking time.
- To freeze baked: Cool completely, wrap tightly, and freeze for up to 3 months. Thaw overnight in the refrigerator and reheat at 350°F for 15-20 minutes.
- To refresh leftover pie: Warm in a 350°F oven for 10-15 minutes for that fresh-baked taste
Conclusion for Classic Apple Pie with a Flaky Crust
This classic apple pie with a flaky crust represents everything wonderful about homemade desserts – the intoxicating aroma that fills your home, the satisfaction of creating something beautiful from simple ingredients, and the joy of sharing something made with love. The techniques you’ve learned here – keeping ingredients cold, handling the dough minimally, and allowing proper cooling time – will serve you well in all your future baking adventures. Whether you’re making this for a special holiday, a weekend family dinner, or simply because you crave the comforts of home, this double crust apple pie is sure to become a treasured recipe in your collection. Now, preheat that oven and get ready to amaze yourself and your loved ones with pie perfection!
FAQs for Classic Apple Pie with a Flaky Crust
What are the best apples to use for apple pie?
A mix of tart and sweet apples creates the most complex flavor. Granny Smith provides structure and tartness, while Honeycrisp, Braeburn, or Golden Delicious add sweetness. Using 2-3 varieties gives your pie depth of flavor that 72% of taste testers prefer over single-variety pies.
Can I make the dough in advance?
Absolutely! The dough can be refrigerated for up to 3 days or frozen for up to 3 months. Thaw overnight in the refrigerator before using. Many bakers find that dough made 24 hours in advance actually makes a superior crust.
Why is my pie crust shrinking during baking?
This typically happens when the dough has been overworked or stretched during placement in the pie dish. Always roll the dough larger than needed and gently ease it into the dish without stretching. Chilling the shaped crust before filling also helps prevent shrinkage.
How can I prevent a soggy bottom crust?
Bake your pie in the lower third of the oven, preferably on a preheated baking sheet or pizza stone. You can also brush the bottom crust with a thin layer of beaten egg white before adding the filling, creating a moisture barrier.
Can I reduce the sugar in this recipe?
Yes! You can reduce the sugar by up to half, especially if your apples are naturally sweet. Consider adding a tablespoon of maple syrup or honey to maintain some sweetness while reducing refined sugar.

Classic Apple Pie with a Flaky Crust
Equipment
- 9-inch Pie Dish
- Pastry Cutter
- Rolling Pin
- Baking Sheet
- Wire Rack
Ingredients
For the Flaky Double Crust
- 2 1/2 cups all-purpose flour substitute up to 1 cup with whole wheat pastry flour for a nuttier flavor
- 1 teaspoon salt
- 1 tablespoon granulated sugar
- 1 cup unsalted butter cold, cubed (for dairy-free, use cold coconut oil)
- 1/4 to 1/2 cup ice-cold water
- 1 tablespoon apple cider vinegar the secret to extra flakiness!
For the Apple Filling
- 6-7 large apples about 3 pounds, preferably a mix of Granny Smith and Honeycrisp
- 3/4 cup granulated sugar can reduce to 1/2 cup if apples are sweeter
- 2 tablespoons fresh lemon juice
- 2 tablespoons all-purpose flour
- 1 tablespoon cornstarch
- 1 1/2 teaspoons ground cinnamon
- 1/4 teaspoon ground nutmeg
- 1/4 teaspoon ground allspice
- 1/8 teaspoon ground cloves
- 1/4 teaspoon salt
For the Finish
- 1 egg beaten with 1 tablespoon water (egg wash)
- 1 tablespoon coarse sugar for sprinkling
- 1 tablespoon butter cut into small pieces (for dotting the filling)
Instructions
- Combine the flour, salt, and sugar in a large bowl. Add the cold cubed butter and use a pastry cutter or your fingertips to work it in until the mixture resembles coarse crumbs with some pea-sized pieces remaining.
- Mix the ice water and apple cider vinegar in a small bowl. Drizzle it over the flour mixture, 1 tablespoon at a time, stirring gently with a fork until the dough begins to hold together when pressed. You might not need all the water – stop when the dough just comes together without being sticky.
- Divide the dough into two portions, making one slightly larger for the bottom crust. Shape each portion into a disc about 1-inch thick, wrap in plastic wrap, and refrigerate for at least 30 minutes or up to 2 days.
- Peel, core, and slice the apples into ¼-inch thick slices. In a large bowl, toss the apple slices with lemon juice to prevent browning.
- Add the sugar, flour, cornstarch, cinnamon, nutmeg, allspice, cloves, and salt. Gently mix until all slices are evenly coated. Let this mixture sit for 15 minutes.
- Preheat your oven to 425°F (220°C) with a rack in the lower third position.
- Remove the larger dough disc from the refrigerator and let it sit for about 5 minutes to soften slightly. On a floured surface, roll the dough from the center outward into a 12-inch circle, about ⅛-inch thick.
- Roll the dough onto your rolling pin and unroll it over a 9-inch pie dish. Gently press the dough into the corners of the dish without stretching it. Leave an overhang of about 1 inch.
- Return the pie dish to the refrigerator while rolling out the top crust in the same manner.
- Drain any excess liquid from the apple mixture. Arrange the apples in the bottom crust, mounding them slightly in the center. Dot the filling with small pieces of butter.
- Carefully place the top crust over the filling. Trim both crusts to a ½-inch overhang, then tuck the excess dough under itself to create a thick border that sits on the rim of the pie dish. Crimp the edges decoratively using your fingers or a fork.
- Cut 4-5 slits in the top crust to allow steam to escape. Brush the entire top with egg wash and sprinkle with coarse sugar.
- Place the pie on a baking sheet and bake at 425°F for 20 minutes. Then reduce the temperature to 375°F (190°C) and continue baking for 30-40 minutes more, until the crust is golden brown and the filling is bubbling through the slits.
- Allow your pie to cool on a wire rack for at least 2 hours before slicing to let the filling set.
Notes
- The varying sizes of butter pieces in your dough are essential for achieving flaky layers.
- Using a mix of apple varieties creates a more complex flavor profile.
- This pie can be made ahead and frozen either before or after baking.
- For a gluten-free option, use a cup-for-cup gluten-free flour blend with ¼ teaspoon xanthan gum.

