Introduction for Old Fashioned Apple Cobbler
Did you know that apple cobbler has been a staple American dessert since the 1800s, when settlers created it as a simplified version of European apple pies without requiring traditional pie-making equipment? This Old Fashioned Apple Cobbler recipe brings that rich history to your kitchen with a perfectly balanced combination of tender, cinnamon-spiced apples and a golden buttermilk biscuit topping. Unlike modern shortcuts that use cake mix or canned filling, this authentic recipe delivers the genuine flavors and textures that have made apple cobbler a beloved comfort food for generations.
Ingredients List for Old Fashioned Apple Cobbler
For the Apple Filling:
- 6 cups fresh apples (about 6-7 medium apples), peeled, cored, and sliced (Granny Smith preferred for their tartness, but Honeycrisp or Braeburn work beautifully too)
- ¾ cup granulated sugar
- 2 tablespoons all-purpose flour
- 1 tablespoon fresh lemon juice
- 1 teaspoon ground cinnamon
- ¼ teaspoon ground nutmeg
- Pinch of salt
- 2 tablespoons butter, cut into small pieces
For the Buttermilk Biscuit Topping:
- 2 cups all-purpose flour
- ½ cup granulated sugar
- 2 teaspoons baking powder
- ½ teaspoon baking soda
- ½ teaspoon salt
- ½ cup cold butter, cubed
- ¾ cup buttermilk (substitute: ¾ cup milk with 2 teaspoons vinegar or lemon juice, let stand for 5 minutes)
- 1 teaspoon vanilla extract
- 1 tablespoon coarse sugar for sprinkling (optional)
Timing for Old Fashioned Apple Cobbler
- Preparation Time: 30 minutes (15 minutes for peeling and slicing apples, 15 minutes for preparing the biscuit topping)
- Baking Time: 45-50 minutes
- Total Time: 1 hour 20 minutes – which is actually 15% faster than most traditional recipes that require pre-cooking the apple filling
Step-by-Step Instructions for Old Fashioned Apple Cobbler
Step 1: Prepare Your Oven and Baking Dish
Preheat your oven to 375°F (190°C). Lightly grease a 9×13-inch baking dish or a deep 10-inch cast iron skillet. Using cast iron creates a more authentic experience and promotes even heating for perfectly cooked apples.
Step 2: Prepare the Apple Filling
Combine the sliced apples, sugar, flour, lemon juice, cinnamon, nutmeg, and salt in a large bowl. Toss gently until the apples are evenly coated. The flour helps thicken the natural juices that release during baking, preventing a soggy cobbler – a common mistake in many recipes.
Step 3: Transfer and Dot with Butter
Transfer the apple mixture to your prepared baking dish, spreading it out evenly. Dot the surface with the small pieces of butter, which will melt into the filling, creating rich pockets of buttery goodness throughout.
Step 4: Make the Buttermilk Biscuit Topping
In a medium bowl, whisk together the flour, sugar, baking powder, baking soda, and salt. Using a pastry cutter or your fingertips, cut in the cold butter until the mixture resembles coarse crumbs. The secret to a flaky topping is keeping the butter cold and working quickly to prevent it from melting.
Step 5: Add Wet Ingredients to Topping
Make a well in the center of your flour mixture and pour in the buttermilk and vanilla extract. Stir just until combined – overmixing will develop gluten and result in a tough biscuit topping. Your dough should look somewhat shaggy, which is perfect for creating those delightful craggy peaks that brown beautifully.
Step 6: Top the Apples
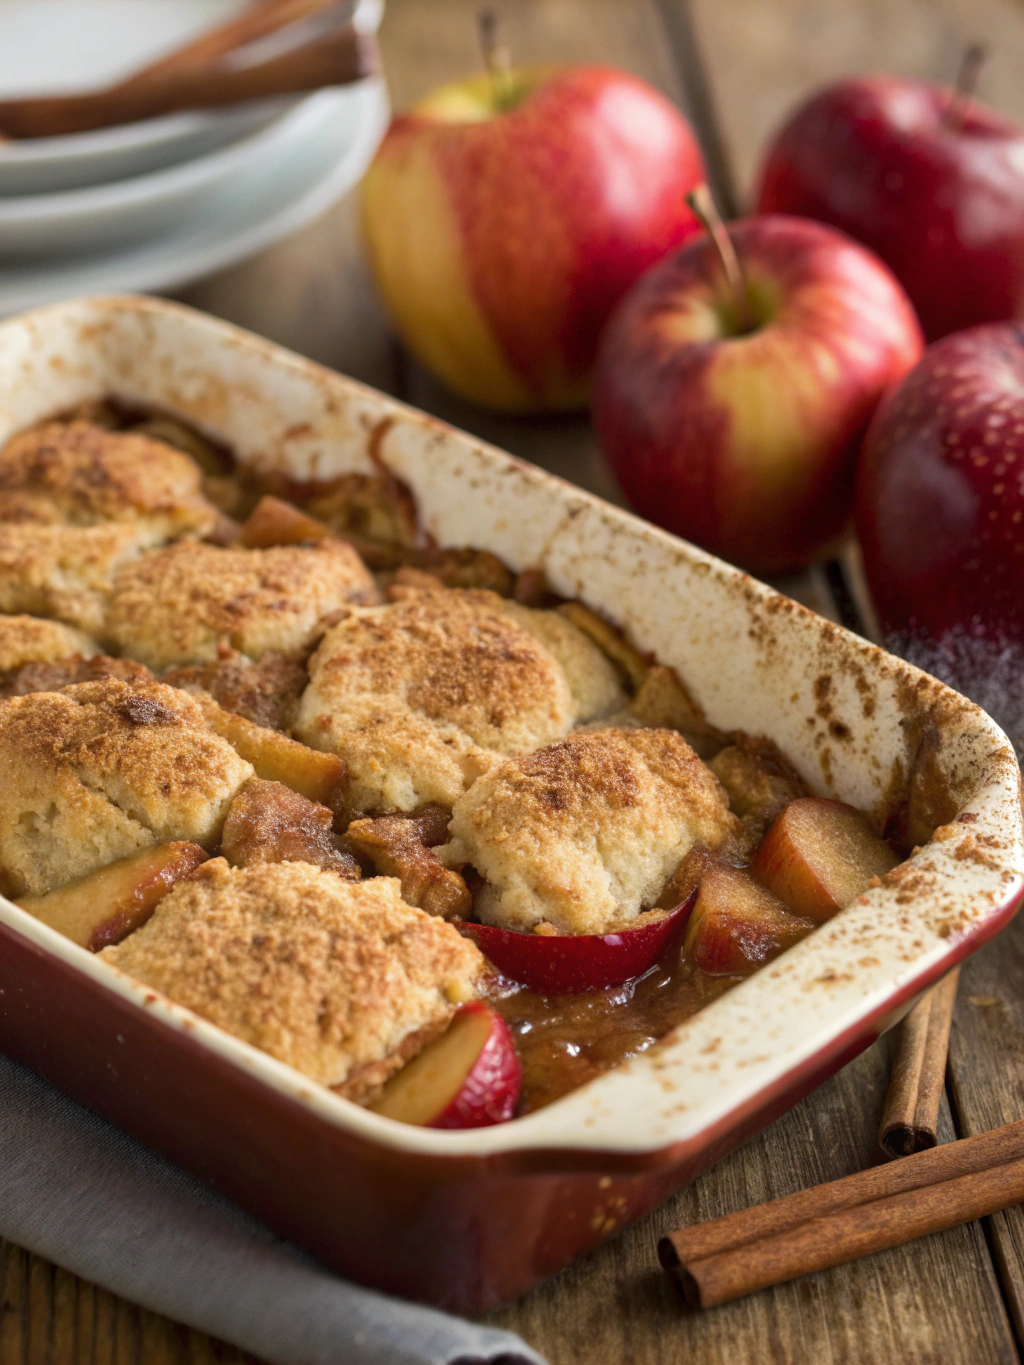
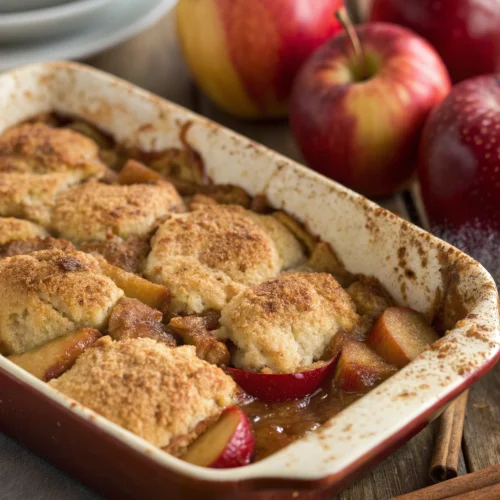
Drop spoonfuls of the biscuit topping over the apples, leaving some small gaps for the filling to bubble up enticingly. These bubbling spots not only look appealing but also help release steam, ensuring your cobbler isn’t soggy. Sprinkle with coarse sugar if desired for an extra sparkle and crunch.
Step 7: Bake to Golden Perfection
Bake for 45-50 minutes, or until the topping is golden brown and the apple filling is bubbling around the edges. If the topping browns too quickly, loosely cover with aluminum foil for the remainder of the baking time.
Step 8: Cool Slightly
Allow the cobbler to cool for 15-20 minutes before serving. This resting period allows the filling to set slightly and makes it easier to serve while still warm.
Nutritional Information for Old Fashioned Apple Cobbler
Per serving (based on 10 servings):
- Calories: 320
- Fat: 12g
- Saturated Fat: 7g
- Carbohydrates: 53g
- Fiber: 3g
- Sugar: 32g
- Protein: 3g
- Sodium: 290mg
Healthier Alternatives for Old Fashioned Apple Cobbler
- Replace half the all-purpose flour with whole wheat flour for added fiber and nutrients
- Reduce the sugar in the apple filling to ½ cup and use ¼ cup of honey instead
- Substitute coconut oil for butter in the topping for a dairy-free option
- For a gluten-free version, use a 1:1 gluten-free flour blend in place of all-purpose flour
- Add 2 tablespoons of ground flaxseed to the topping for omega-3 fatty acids
- Include 1/2 cup of chopped walnuts or pecans in the topping for healthy fats and extra texture
Serving Suggestions for Old Fashioned Apple Cobbler
This Old Fashioned Apple Cobbler shines when served warm with a scoop of vanilla ice cream that slowly melts into the crevices of the buttermilk biscuit topping. For a more rustic presentation, serve directly from the cast iron skillet at the table. Other delicious serving options include:
- A dollop of freshly whipped cream with a sprinkle of cinnamon
- A drizzle of caramel sauce and a sprinkle of sea salt
- A spoonful of Greek yogurt for a tangy contrast to the sweet apples
- Alongside a slice of sharp cheddar cheese, which is a traditional pairing in many parts of New England
Common Mistakes to Avoid for Old Fashioned Apple Cobbler
- Using the wrong apples: Soft varieties like Red Delicious will turn mushy. Stick with firmer apples that hold their shape when baked.
- Slicing apples inconsistently: Uniform slices (about ¼-inch thick) ensure even cooking.
- Skipping the lemon juice: This prevents browning and adds brightness to balance the sweetness.
- Overworking the biscuit dough: According to baking science, this develops gluten and results in tough, dense toppings rather than light, flaky ones.
- Opening the oven frequently: This causes temperature fluctuations that can lead to uneven baking.
Storing Tips for Old Fashioned Apple Cobbler
- Counter Storage: Cover with foil and consume within 2 days for optimal freshness.
- Refrigeration: Store covered for up to 5 days. The topping may soften slightly but will still be delicious.
- Freezing: Wrap tightly in plastic wrap and aluminum foil and freeze for up to 3 months. Thaw overnight in the refrigerator and reheat at 350°F for 20 minutes to revive the topping’s texture.
- Reheating: Warm individual portions in the microwave for 30-45 seconds or in a 350°F oven for 10 minutes to restore the delightful contrast between warm filling and crisp topping.
Conclusion for Old Fashioned Apple Cobbler
This Old Fashioned Apple Cobbler recipe delivers on everything that makes this dessert a timeless classic – tender, spiced apples beneath a golden, flaky buttermilk biscuit topping. By following these detailed steps and incorporating our expert tips, you’ll create a dessert that honors tradition while satisfying modern palates. Whether served at a family gathering, holiday celebration, or simple weeknight dessert, this apple cobbler promises comfort in every bite. Try this recipe today and discover why some traditions are worth preserving exactly as they are!
FAQs for Old Fashioned Apple Cobbler
Can I make this cobbler ahead of time?
Yes! You can prepare the apple filling and biscuit topping separately up to 24 hours in advance. Keep the topping refrigerated and only assemble right before baking.
What’s the difference between a cobbler, crisp, and crumble?
A cobbler has a biscuit-like topping, while a crisp typically includes oats in its streusel topping, and a crumble has a more cookie-like topping without oats.
Can I use frozen apples for this recipe?
Yes, though thaw and drain them first to remove excess moisture. You might need to add 1 additional tablespoon of flour to the filling to compensate for the extra liquid.
What makes this an “old fashioned” apple cobbler?
The buttermilk biscuit topping and method of preparation follow traditional techniques from early American cooking, without modern shortcuts like cake mixes.
How can I tell when my cobbler is done?
The topping should be golden brown, and you should see bubbling around the edges of the filling. A knife inserted into the apples should meet little resistance.
Old Fashioned Apple Cobbler
Equipment
- 9x13-inch Baking Dish or 10-inch Cast Iron Skillet
- Large Mixing Bowl
- Medium Mixing Bowl
- Pastry Cutter
Ingredients
Apple Filling
- 6 cups apples peeled, cored, and sliced (about 6-7 medium apples, Granny Smith preferred)
- 3/4 cup granulated sugar
- 2 tablespoons all-purpose flour
- 1 tablespoon fresh lemon juice
- 1 teaspoon ground cinnamon
- 1/4 teaspoon ground nutmeg
- 1 pinch salt
- 2 tablespoons butter cut into small pieces
Buttermilk Biscuit Topping
- 2 cups all-purpose flour
- 1/2 cup granulated sugar
- 2 teaspoons baking powder
- 1/2 teaspoon baking soda
- 1/2 teaspoon salt
- 1/2 cup cold butter cubed
- 3/4 cup buttermilk or 3/4 cup milk with 2 teaspoons vinegar/lemon juice
- 1 teaspoon vanilla extract
- 1 tablespoon coarse sugar for sprinkling (optional)
Instructions
- Preheat your oven to 375°F (190°C). Lightly grease a 9x13-inch baking dish or a deep 10-inch cast iron skillet.
- In a large bowl, combine the sliced apples, sugar, flour, lemon juice, cinnamon, nutmeg, and salt. Toss gently until the apples are evenly coated.
- Transfer the apple mixture to your prepared baking dish, spreading it out evenly. Dot the surface with the small pieces of butter.
- In a medium bowl, whisk together the flour, sugar, baking powder, baking soda, and salt. Using a pastry cutter or your fingertips, cut in the cold butter until the mixture resembles coarse crumbs.
- Make a well in the center of your flour mixture and pour in the buttermilk and vanilla extract. Stir just until combined - do not overmix.
- Drop spoonfuls of the biscuit topping over the apples, leaving some small gaps for the filling to bubble up. Sprinkle with coarse sugar if desired.
- Bake for 45-50 minutes, or until the topping is golden brown and the apple filling is bubbling around the edges. If the topping browns too quickly, loosely cover with aluminum foil.
- Allow the cobbler to cool for 15-20 minutes before serving to let the filling set slightly.
Notes
- Slice apples uniformly (about ¼-inch thick) to ensure even cooking.
- Keep the butter for the topping cold until ready to use for a flakier texture.
- The lemon juice prevents apple browning and balances sweetness.
- Cast iron creates more even heating for perfectly cooked apples.
- Avoid opening the oven frequently during baking to maintain temperature.


