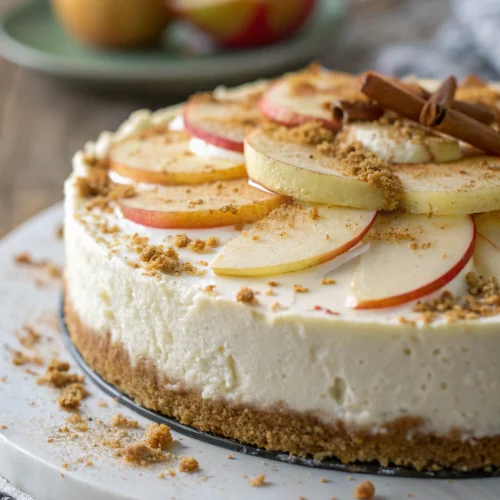
No-Bake Apple Pie Cheesecake
This innovative hybrid dessert combines the beloved flavors of classic apple pie with the creamy indulgence of cheesecake, all without turning on your oven! Perfect for when you want a show-stopping dessert with less effort and preparation time than traditional apple pie.
Equipment
- 9-inch Springform Pan
- Electric Mixer
- Skillet
- Rubber Spatula
Ingredients
Graham Cracker Crust
- 2 cups graham cracker crumbs about 16 full sheets, finely crushed
- 1/2 cup unsalted butter melted
- 1/4 cup granulated sugar
- 1 tsp ground cinnamon
Cheesecake Filling
- 16 oz cream cheese softened at room temperature (2 blocks)
- 1 cup powdered sugar
- 1 tsp vanilla extract
- 1 tbsp fresh lemon juice
- 2 cups heavy whipping cream whipped to stiff peaks
Apple Pie Topping
- 4 medium apples preferably Granny Smith or Honeycrisp, peeled and diced
- 1/4 cup unsalted butter
- 1/2 cup brown sugar packed
- 2 tbsp lemon juice freshly squeezed
- 1 tbsp ground cinnamon
- 1/2 tsp ground nutmeg
- 1/4 tsp ground cloves
- 2 tbsp cornstarch mixed with 2 tablespoons water
Instructions
- In a medium bowl, combine the graham cracker crumbs, melted butter, sugar, and cinnamon until the mixture resembles wet sand.
- Press the mixture firmly into the bottom and slightly up the sides of a 9-inch springform pan. Use the flat bottom of a measuring cup to compact the crust evenly.
- Place the crust in the refrigerator for at least 30 minutes to firm up while preparing the filling.
- In a large bowl, beat the softened cream cheese until completely smooth and free of lumps – about 2 minutes.
- Gradually add the powdered sugar, vanilla extract, and lemon juice, continuing to beat until well incorporated and silky smooth.
- In a separate bowl, whip the heavy cream until stiff peaks form. For best results, chill your bowl and beaters in the freezer for 10 minutes before whipping.
- Gently fold the whipped cream into the cream cheese mixture using a rubber spatula with a figure-eight motion.
- Spoon the cheesecake filling onto the prepared crust, smoothing the top with an offset spatula. Create a slight depression in the center to hold the apple topping.
- Cover the springform pan with plastic wrap and refrigerate for at least 4 hours or overnight.
- In a large skillet over medium heat, melt the butter. Add the diced apples and cook for 3-4 minutes until they begin to soften but still maintain some firmness.
- Add the brown sugar, lemon juice, cinnamon, nutmeg, and cloves. Stir to combine and continue cooking for another 3-4 minutes until the apples are tender but not mushy.
- Stir in the cornstarch slurry (cornstarch mixed with water) and cook for an additional 1-2 minutes until the mixture thickens to a glossy, syrupy consistency.
- Remove from heat and allow to cool completely to room temperature.
- Once the apple topping has cooled completely, spoon it evenly over the chilled cheesecake.
- Return the assembled cheesecake to the refrigerator for at least 1 hour to allow the flavors to marry before serving.
- When ready to serve, gently run a thin knife around the edge of the springform pan before releasing the sides.
Notes
For a lighter version, substitute one block of cream cheese with Greek yogurt cheese (strained Greek yogurt).
For a gluten-free option, use gluten-free graham crackers or try a gingersnap cookie crust.
Store leftovers in the refrigerator, covered, for up to 5 days.
The cheesecake base can be frozen without the topping for up to 2 months - add fresh apple topping after thawing.
Nutrition
Calories: 420kcalCarbohydrates: 41gProtein: 4gFat: 28gSaturated Fat: 17gCholesterol: 95mgSodium: 220mgFiber: 2gSugar: 30g
Tried this recipe?Let us know how it was!